-
Support posts
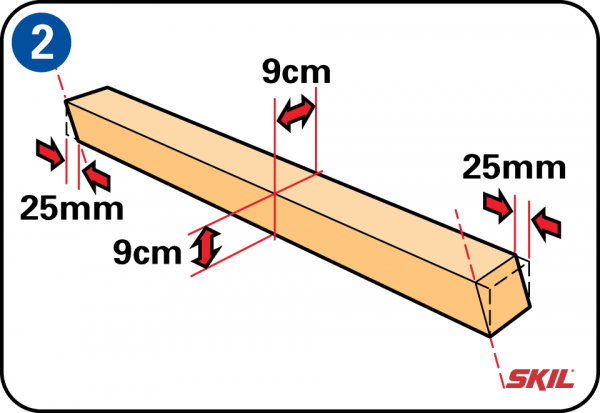
Start with the two front and two back posts, and saw all four posts to match the slope of the roof (25 mm height difference between the front and back edges of each post).
-
Roof supports
Saw the ends of the two roof supports at an angle, again with a 25 mm slope. Make sure both sides are parallel. The roof supports should protrude by 30 cm at the front for extra protection against rain.
-
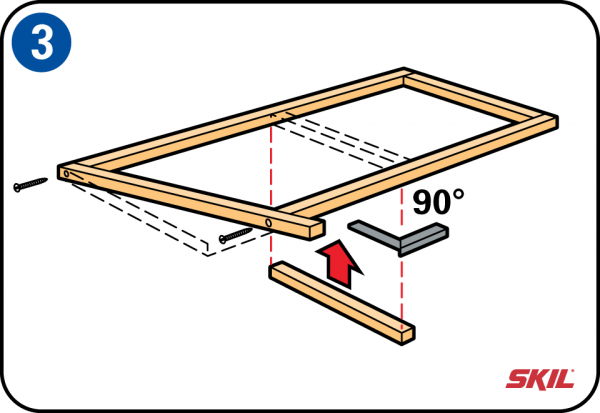
Fit the left side panel
Place the front and back posts on a flat surface, parallel with each other at the desired width apart and with the sawn-off sloping ends in the same direction. Join the tops of the posts with the roof support, with an overlap of 30 cm at the front. Pre-drill the holes with a thin wood drill to prevent the wood from cracking. Insert only 1 screw at each joint, but don’t tighten it yet. Join the posts at half-height with a plank or lath, but don’t tighten the screws here either. Check with a try square that this plank is at right-angles to the posts, and then insert and tighten all the screws.
-
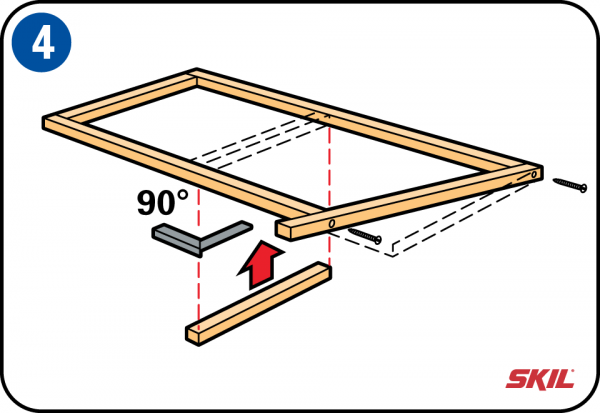
Fit the right side panel
Follow the same procedure with the right panel (remember this is a mirror image of the left side panel). Fit the plank or lath at half-height as shown in the illustration below.
-
Fit the top front and back cross-members
Stand both side panels upright and screw the back cross-member to the support posts at the same height as the roof supports. Don’t forget to pre-drill the support posts. Then screw the front cross-member to both side panels in the same way.
-
Fit the center cross-members
Now you can fit the center cross-members at half-height. Start by screwing the back cross member to the back support posts at the same height as the planks or laths between the support posts. Then fit the front cross-member to the front support posts.
-
Fit the roof panel
You can make the roof panel of the log store out of 18 mm waterproof multiplex. Remember that the roof has to overlap the two sides and the front by about 30 cm. Place the roof panel on the frame, align the back edge with the back of the frame, and adjust the position of the roof so that it overlaps each side by the same amount. Then screw the roof panel to the frame.
-
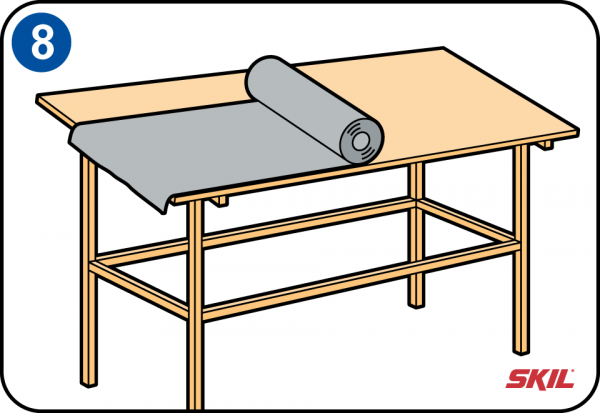
Cover the roof panel
You can cover the roof panel of the log store with a corrugated roofing sheet or with self-adhesive roofing felt and roofing nails.
-
Cover the sides
You can cover the sides with wood cladding, or for better ventilation you can use horizontal wooden planks or laths with gaps between them. Now you can fit the central shelf. You can make this out of waterproof multiplex or from the same wood cladding that you used to cover the sides.
-
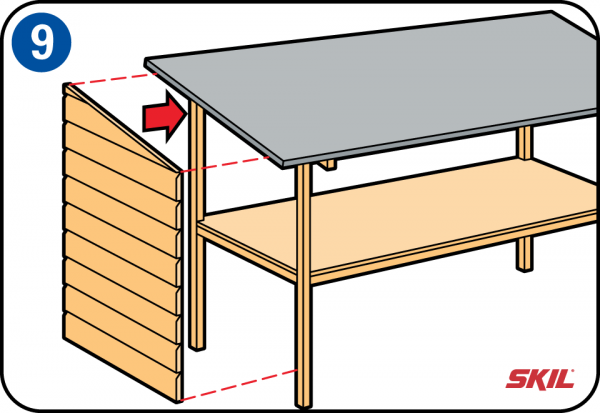
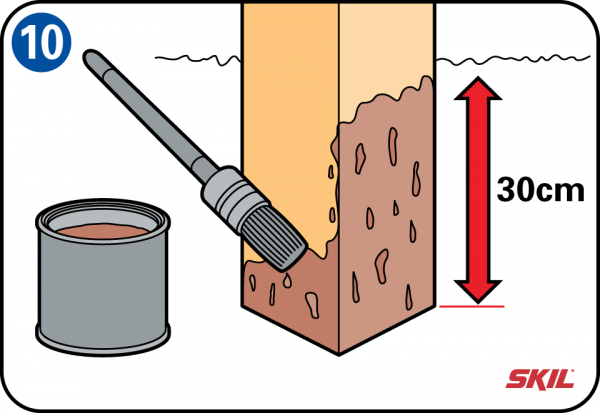
Treating the wooden posts
You can treat the lower parts of the support posts with oleum, a replacement for creosote intended specially for outdoor use.
Place the store against a wall and sink the support posts at least 30 cm into the ground. Fix the posts to the wall using 8 mm screws and wall plugs. -
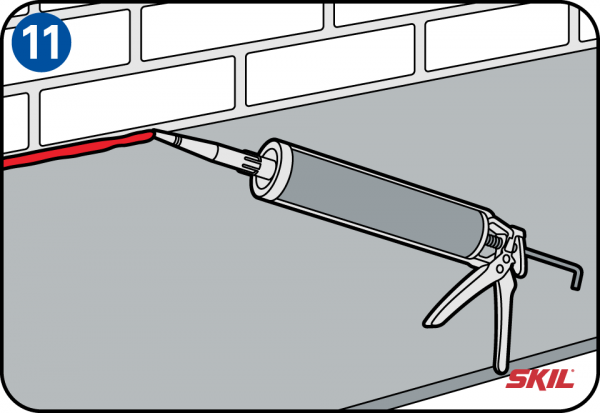
Finishing the roof
Finally, close the gap between the wall and the roof with sealant so no water can enter.